• Home
  • Products
  • Purchase
  • Support
  • Company

CompuClever Blog

Introducing the BloomSky Network

March 31, 2016 by Andy Thompson

For some of us, spring is coming soon this year, and we are getting ready for the bloom.  With the coming of the season, we put more attention on the sky.  So what better time for us to roll out a review of a technology that we are really excited about! In a mini series of three articles, we are introducing our readers to BloomSky – a crowd-sourced, hyper-local weather network powered by an innovative smart weather station.

We’ll get started by looking at the company vision and the technology offered.

The company vision at BloomSky is to change the way people access weather information.  They are setting out to build a weather network based on data that is “crowd-sourced” and image based.  Weather is captured by devices around the world by regular people and presented using images and daily time-lapse photographs.  Of course it is available to be viewed online with your PC or your mobile device.

BloomSky

The Vision:

Speaking of regular people, we’ve had a chance to connect with the CEO and the marketing coordinator at BloomSky who shared more about the company and the vision.  They are located in the Bay area and the CEO’s name is Xiao (pronounced: Shee’ou).  He tells us his goal is to bring about the largest independent data network that covers the globe.  The emphasis is on “independent”.  The collection of weather data is independent from other sources.  They want to better serve areas not currently covered by government or agencies.   This includes for example, rural areas and territories that have little to no coverage.

The Product:

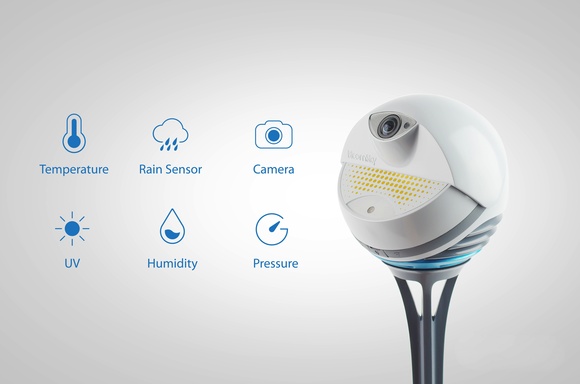
The hardware portion of this technology is an HD camera equipped smart device with some impressive features:

BloomSky

  • Ultra-wide Angle Camera: captures pictures of the sky every five minutes, creating a time-lapse video at the end of the day.
  • Dependable Weather Sensors: measures temperature, humidity, barometric pressure, UV exposure, and precipitation using reliable sensors.
  • Constant Data Collection: records weather information uninterruptedly with the solar panel option.
  • Designed with Durability: adapts to the harshest weather conditions, including gusts, downpours, dust, and UV radiation thanks to its aerodynamic design.
  • Smart Wireless Integration: connects seamlessly through a Wi-Fi router and smartphone, as well as with other smart home hardware and applications.
  • Broadcast to the World: provides the ability to share weather data and images to family, friends and the world.
  • Powered by Solar: BloomSky can be optionally powered by solar panels so that it can be installed at a location where direct AC power is not easily accessible.

Here’s a good video that highlights the functionality of this device:

The Community:

Taking part in the BloomSky community is easy and you can choose your level of involvement.  We’ll start by introducing you to the basics.  The application is freely offered in the following flavors:

  • Free online service at: https://maps.bloomsky.com/; no account is necessary and there is no download!
  • Free mobile app available for iOS and Android; again, no account required and it is free.  Simply go to the App Store or Google Play and look for “BloomSky”.

Let’s Get Started:

We’ll walk you through the first steps of checking out the BloomSky community.  Once on the site you can begin to explore locations around the globe!

  1. Click on the link: https://maps.bloomsky.com/
    The web page is divided into two regions as can be seen in the image.BloomSky Community
  2. In the top half you can enter a location in the search box like so…
    BloomSky CommunityNote: You can also move the map and find a location using the red circle regions.
  3. Click on a red circle or any of the images in the lower half which are a subset of the BloomSky devices within the viewable map.  A box appears with a current image of the sky from that location. Now you can click the image or the “View Details” button to get weather information such as what you see here:
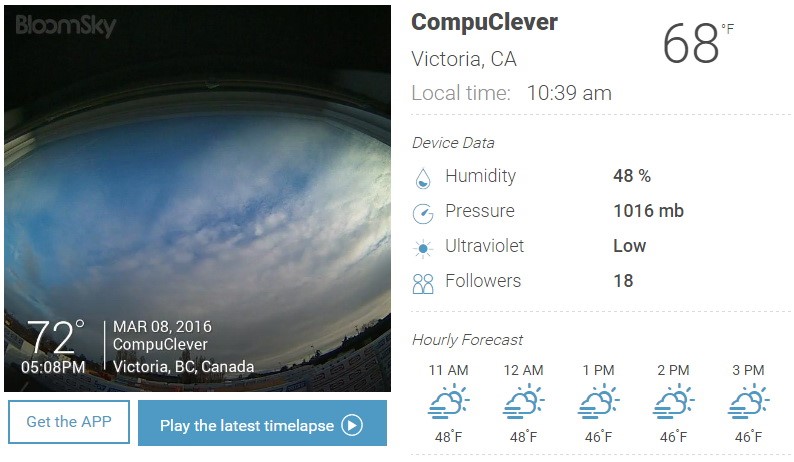
    BloomSky Community
    You can also play a time-lapse of the previous day’s weather.

Our First Impression:

Like the BloomSky community growing around the globe, we’re excited.  This is real-time weather tracking provided by real people.  It’s a true indication of a global neighborhood.  The features that inspire us include:

  • Access to current weather data and forecasts.
  • Real-time view of the sky around the globe.
  • Relevant weather information from five high-grade sensors to measure: temperature, humidity, barometric pressure, UV, and precipitation when it occurs.
  • Easy to operate interactive map.
  • Easy to access daily time-lapse videos.
An offer for our readers: 

For those who are interested in joining the BloomSky network, BloomSky is currently offering an unprecedented special promotion to our readers. Simply follow the link and use coupon code: COMPUCLEVER to get up to $40 off when you purchase a solar powered BloomSky weather station.

Disclaimer: CompuClever will not financially benefit from any purchase that may result from this article, which serves as a purely independent review.

As the BloomSky community is saying… it’s fun and educational too.  We will be following up this review with further reviews of the BloomSky technology for those of our readers that are interested in taking the next step:  getting a BloomSky weather device of their very own.

Stay tuned!


Filed Under: Blog, Gears and Gadgets, Smart Device Tagged With: BloomSky, Gears and Gadges, Product Review

Keep’n It Cool

March 19, 2016 by Andy Thompson

Things are heating up – which means PC temperatures are rising. Just how important is it to make certain that your PC does not overheat? We’ll introduce a story from one of our expert support technicians and then get into potential issues that can result. We’ll conclude with ways of addressing overheating PC systems and laptops.

With our previous article (ReadyBoost) we received some email responses that were very positive. One email responder stated that he and a group of friends got some real benefit from the free technology we presented. One of the members of the group stated that their PC was “…working much more smoothly after implementing your USB know how.” The email went on to suggest we cover the topic of making sure that the “computers processor runs as cool as possible and what to do if it is running to hot.” That’s a great suggestion and we had already begun to write about this subject.

We’ll get started with a story from one of our Tech Support specialists.

Fan or Wireless Connection?

You can find all sorts of odd occurrences with your PC system and sometimes the oddest issue can arise with what appears to be no solution in sight. My system had been in use for a few years and when I heard a small high pitched squeal, I figured a fan was going. No problem, the case was cool and the temperature was not anywhere near being a problem.

The problem that was driving me crazy however was my internet connection. The system was using a wireless connection and it had developed an intermittent disconnect. The first couple of connection drops I put down to just a random issue and ignored. But they continued to happen and eventually the system could not connect to the internet. Okay… time to put on the troubleshooting hat and work this out.

I checked the wireless connection using a laptop, it worked so the issue was not the wireless. I checked the router to make certain there was not some sort of issue where the computer was not being allowed onto the network. I found nothing of the sort.

Next, I reinstalled the software for connecting to the router, double and triple-checked the settings only to find that everything was correct. I spent a couple of evenings going over every possible inch of the network wireless connection and could not find a problem.

In frustration, and after listening to the fan for a couple of days, I said: “Fine! I’ll replace the fan, at least that much I can fix!” I powered the computer off, pulled the problem fan and got a replacement. After I had it installed and started a system back up, my jaw promptly went slack! My PC had signed onto the network right away. I had my wireless internet connection once again.

Potential Problems and Pointers:

The PC system does not have one temperature. It has several components and each run at a different temperature. The CPU (Central Processing Unit), for your PC does most of the work so that Windows and running programs perform as expected. That is to say, it processes all the tasks. Ideally it should be running at room temperature. Most recently built CPU’s have protection features to deal with the heat. However, there are circumstances where it can run hot for extended periods of time and problems can arise including system crashes and even physical damage to the CPU or other components.

Recommendation: Aim to have your CPU running at 45 – 50 degrees C (113 – 122 F) to be on the safe side. The absolute maximum should be 60 degrees (140 F) maximum.

There are other components that can use electricity and generate heat such as your hard disk drives, the optical drive (for CD’s and DVD’s), and the GPU (Graphics Processing Unit) which really comes into play when playing games. Excessive heat can damage components rendering them inoperable. With respect to hard drives, one source states:

Heat decreases the life of the hard drive head. A 5 °C increase in temperature could reduce the life of a hard drive by up to two years[1].

Heat can also warp the hard drive disks to the point that you would no longer be able to retrieve the data stored on them. Even recovering data in these situations may not be possible. The effects of this are greater with older components. Another factor to consider, one that most experts will agree, is that the lifespan of your PC will be lessened by excessive heat.

There are free utility programs to check for PC temperatures if you feel your system is running hot and we’ll leave that for you to search online. A few basic precautionary measures can go a long way to prevent issues arising from over-heating your system.

Laptops: Although they produce less heat, they are tightly packed and can be more challenging to remedy. Make sure your laptop has adequate air flow and not running on a cushion or pillow, or inside a tightly enclosed area. Damage to laptops can include failure to components and decreased lifespan. There have even been reports of overheated laptops burning down homes.[2][3] 

Signs of overheating can include:

  • Fan running constantly and making excessive noises.
  • Basic tasks are impaired / slow.
  • Lines on your screen.
  • Your system freezes or abrupt shutdowns occur (including blue screen of death).

Recommendations:

Excessive heat is typically due to inability to cool your PC down. It could be a faulty fan or it could be due to poor ventilation. Ventilation is quite often affected by a number of easily remedied factors. Check if any of these could be what you are facing:

  • Is your PC tower directly against a wall and not getting adequate air flow to it?
  • Are any boxes or papers covering the back of the tower where the fan vent is located?
  • Is the fan functional or making any noises (as with our story above)?
  • When you look at the back of your PC tower, is there excessive dust that could be clogging up the ventilation?
  • Is your ambient room temperature overly hot?

If you are experiencing any of these contributing factors, you may find it easy to fix the situation and get your PC operating at normal temperatures. Keep your system clean and make sure the ambient temperatures are reasonable. For your laptop, you can easily provide better exposure to air circulation by putting it up on a box (you might have to look at using a USB keyboard and mouse).

As our technician detected right away… high pitched whirling sounds need to be addressed. Make sure your fan is working. If it is not within your level of expertise, get a quote from a technician. Fixing a PC fan is not very expensive – you should be able to have this done for under a hundred dollars.

And, in case you are wondering what the connection is between a malfunctioning fan and not being able to get a wireless connection… it was discovered by our technician that the fan was emitting a high frequency tone. It was this tone that caused an interference with the wireless connection!

Conclusions:

As our email responder has stated to us, there are many PC users who have no interest in keeping up with the endless “…trend of system upgrades”. We want our systems to last. We want them to run efficiently. We hope this article serves that purpose and we welcome more feedback and suggestions!

Feel free to visit our Support Center at: https://www.compuclever.com/support/

If you have some ideas of topics you would like us to cover or have other feedback to offer, email us at: newsletter@compuclever.com


[1] http://www.ni.com/white-paper/5730/en/
[2] http://www.boston.com/metrodesk/2013/03/27/
[3] http://www.dailymail.co.uk

Filed Under: Newsletter, PC hardware, Windows tips Tagged With: CPU, Hardware, temperature, Wifi

The Key – USB

February 28, 2016 by Andy Thompson

“Can I get off at the next stop?”  It’s easy when you are on a bus, but not so simple when using computers.  The problem is the information highway is getting faster and trying to navigate can be frustrating.  We hope to make it easier with our upcoming series on USB technology and the functionality that is available.  We’ll get started on a description of USB in general, highlight differences between USB 2.0 and USB 3.0, speak about USB hubs, and then discuss the USB flash drive.

The Connection

Speaking of buses… in case you didn’t know, USB stands for Universal Serial Bus. USB has been around for a long time and it serves to standardize the connection, communication, and in some cases the power supply between a device and your PC.  USB is used for printers, cameras, keyboards, media players, as well as hard drive disks and flash drives.

In general, there are three basic kinds or sizes related to the USB connectors and types of established connection: the older “standard” size, in its USB 1.1, 2.0, and 3.0 variants (for example, on USB flash drives). [1]

USB Comparison

You are most likely dealing with USB 2.0 and USB 3.0 (as well as 3.1).  We’ll focus on these specifically.  The most significant difference between them is speed; the rate at which information can transfer from one device to another.  Compared to USB 2.0, USB 3.0 is about 10 times faster and USB 3.1 is about 20 times faster.  Along with being faster, USB 3.0 also has the ability to provide power if the device does not have a power connection of its own.

How to identify a USB port on your computer or PC:
There are three main ways to identify a USB 3.0 port: 

  1. Typically, if it is blue it is USB 3.0.  However, if it is not blue it could be USB 3.0 as the standard is quickly disappearing as USB 3.0 becomes more popular.
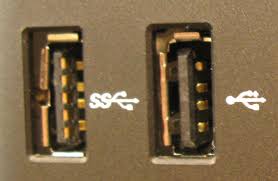
  2. The number of pins: A USB 3.0 port has 9 total pins. 5 in the front and the normal 4 in the back. You can shine a light into the port and if you see the 5 gold pins near the opening and 4 gold pins that are more recessed, you’ve got a USB 3.0 port. (See picture below: on the left is USB 3.0 and the right is USB 2.0).
  3. The symbol: SS stands for “Super Speed” and this also means you have a USB 3.0 port. [2]

How to identify a USB cable:
The cable connector for USB 3.0 is typically blue while USB 2.0 cable connectors are white.  Micro USB connectors look different and, in some cases, have an additional section added to it.  You can see these in the image below, second from the left. 

USB Cable and Repeaters:

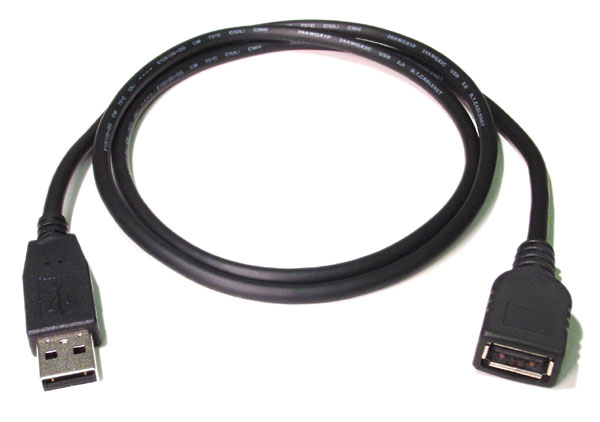
The maximum regular cable length for USB 2.0 is 16 feet 5 inches (5 meters) and for USB 3.0 it is 9 feet 10 inches (3 meters).  You can use active, also known as “repeater”, extension cables which are essentially one port USB hubs (as seen below).  For further information about cables we recommend you click the link to this site.

USB 3.0 – Do You Need It?

Is version 3 necessary for your needs?  It what situations will the speed advantage make a difference?  The answers are fairly straightforward.  The speed advantage gained by using USB 3.0 and 3.1 is useful when dealing with large files or with many files.  If you have a camera with a 32 GB memory stick in it and you take a lot of pictures, USB 3.0 / 3.1 will be much easier in transferring files.  If you use an external hard drive to back up your computer, using the fastest connection and devices will save you time.

Items like mice, keyboards, and your USB nick-nacks to keep your drink warm or cool can connect via USB 2.0 as the speed will mean nothing to these items.  For you serious gamers… plugging your mouse into a USB 3.0 port has no more benefit than 2.0.[3] If you print large files you may get some improvement in printing using USB 3.0 when printing large files, but for most home users getting prints faster is not a pressing need.

Backwards Compatibility

USB 3.0 and 3.1 are backwards compatible.  This means that they support 2.0 but that you will not benefit from the faster speeds available with version 3.  You can plug a USB 2.0 device into a 3.0 port, and a 3.0 device into a USB 2.0 port.  However, connection / transfer speeds will be at the slower rate.  So it is not a matter of needing to remember which device can be connected where, but realizing that you may not be getting the full benefits of the transfer speed.

Also, the cables connecting a USB 3.0 / 3.1 device need to support the standard or else you will be reduced to the slower speed.  The cables for USB version 3 have twice the amount of wire to be able to transfer the electrical current and support the higher transfer rate and thus are more expensive.  In most cases, devices come with the cables and are part of the cost.

USB Hub

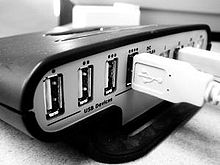
A USB hub can expand one port to several so that you can plug in more than one device.  Laptops can come with several USB ports, and an external USB hub can “…consolidate several everyday devices (like a mouse and a printer) into a single hub to enable one-step attachment and removal of all the devices.” [4]

You need to keep in mind that a USB hub draws its power from the host computer’s interface.  This is referred to as a “bus-powered” hub.  There are self-powered hubs available as well that can provide full power to every port using an external power supply.  Rule of thumb is, if using a bus-powered hub and your device draws a lot of power, it is best to plug your device in a port directly to your PC.  Also keep in mind that if you are using a USB 2.0 hub in a USB 3.0 port, it will work but there is a data transfer bottleneck as you are not getting the full potential transfer speed.

USB 3.0 hubs will support USB 2.0 devices but the Super-Speed capability of 3.0 is, again, not achieved in these situations.  USB 3.0 also includes some power management, so when you have multiple devices connected via a USB 3.0 hub and the devices are drawing power from the hub, only the device in use will receive power so as to not waste power.

When Buying a USB Hub:
If you are going to get a USB hub you’ll need to choose from a non-powered hub and a self-powered hub.  If you decide to go with the former, you won’t have to plug it in so it is more mobile (good for laptops).  However, charging your devices through this kind of hub is not recommended and likely won’t work.  In fact some devices require power directly from the USB port or a self-powered hub to work. 

It is also best to buy one of the most current hubs that support USB 3.0 technology.  Even if your current PC doesn’t use USB 3.0, the next PC you get likely will.  For more information on buying a USB hub: click this link.

The Stick

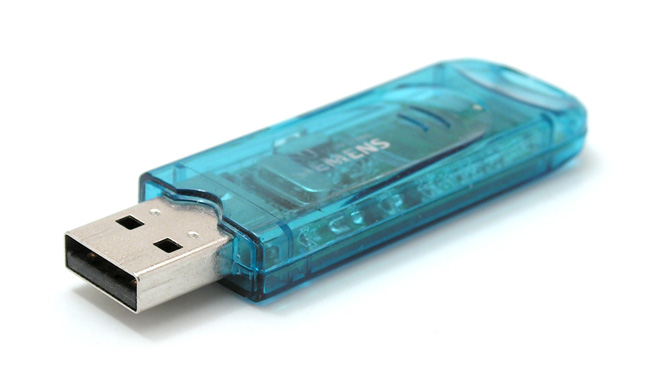
The USB flash drive is also known by many other names including: jump drive, data stick, pen drive, thumb drive, key chain drive, USB key, USB memory stick, and the list goes on.  It is a portable storage device as seen in the image presented here.

Here are the quick facts:

Size: It is about the size of a human thumb, thus the reference to thumb drive.

Storage Capacity:  When they first appeared they were about 8 MB in storage and now, in recent years the storage capacity has increased significantly and 8, 16, and 32 GB drives are common.  There are ones that are as large as 512 GB and 1 TB.

Connection:  It connects to a USB port.

Security:  You can easily lose these little items and they can easily be stolen.  There are third party disk encryption programs designed to protect your data.  As always, you need to back up any important data stored on these devices.

Uses:  Popular uses include data transport, storage of data, backup, and media storage but there are a wide number of uses including booting operating systems, running software programs, and for security – thus the name USB “keys” (or dongle or fobs).  USB flash drives can be inserted into stereo / audio players that support USB, and audio files can be played directly.

What is important to note is that these are an easy way to store and to transfer data.  They do not have any moving parts like an external hard disk drive, they use little power, and the data is safe from dust, shock, magnetic fields, and mechanical shock.  Some specially designed flash drives are even made to be waterproof and virtually unbreakable.

To Use it:
A flash drive can be used like any drive on your computer.  Start by inserting the flash drive into a front or back USB port or to a USB hub.  Once connected, open My Computer and you should see the drive labeled as “Removable Disk”, “Flash drive”, or as the manufacturer’s name.  Once the drive has been determined, you can copy any file you want and paste it into the flash drive or drag-and-drop the files to the flash drive.[5]

In Summary

Picking USB 3.0 or 3.1 devices depends largely on your demands for speedy transfers.  If you are not working with a lot of files or large files, then we recommend checking out the price point between USB 2.0 and more recent versions.  However, keep in mind that technology keeps getting better and if your PC doesn’t support 3.0 now, your next one likely will.

As for USB hubs, we recommend using them for connecting keyboard and mouse peripherals and other devices that do not require speed.  USB flash drives are really handy.  Just keep in mind that they can go missing or be stolen.  Back up and encrypt sensitive data.

We will continue to provide story lines like this that benefit all of us and we will describe them in a manner that is within reach of everyday computer users.  If you have some ideas of topics you would like us to cover, email us at: newsletter@compuclever.com


[1] https://en.wikipedia.org/wiki/USB
[2] http://helpdesk.nationalpaincare.com
[3] http://www.howtogeek.com
[4] https://en.wikipedia.org/wiki/USB_hub
[5] http://www.computerhope.com/jargon/j/jumpdriv.htm

Filed Under: Blog, PC hardware, Windows tips Tagged With: storage device, USB, USB Key

My New PC Arrival

February 9, 2016 by Andy Thompson

What can compare to the feeling of getting a new PC? It’s like watching Tom Hanks in the movie “Big” when he spends a day in the toy department! While reasons for purchasing a new computer will differ from person to person, what remains constant is a level of excitement and anticipation that comes with getting it set up and putting it to use. With any level of excitement comes taking a few moments to take care of certain little necessities before rushing headlong into the fun. Ahhh adulthood!

Stages

We have come up with a list of items that we feel constitute the “necessities” of first running you brand new PC. In an attempt to make it easier for you we have broken these items into stages – that way it doesn’t seem overwhelming and tedious. We have also included an approximate time of completion. These may vary based on many factors but it is intended to give you an idea of what to expect. By having this information available you can determine how many items you can take on based on your schedule. If you want to bite the bullet and complete the tasks on the same day… go for it!

Let’s get started.

Stage1

Warranty and Registration Cards (Time to Complete: Approximately 5 minutes)
Fill warranty and registration cards in right away. Required information such as serial numbers can usually be found on the back of printers and computers. So before you connect the cables and set the device into its location, get the information written down while it is still easy to read. Once the system is up and running, you can then send in the cards to be registered. While most retailers will act on your behalf for warranty concerns if the store closes its doors, the computer maker will require that you provide proof that it is their device and it was purchased within the warranty period. Save yourself the frustration and do this early.

Precaution: In some cases warranty and registry cards can ask for too much information. As a rule, “…a sales receipt should suffice if you need to file a warranty claim”[1]. We’ll let you be the judge of whether too much is being asked of you in terms of potential harvesting of personal data to marketers and whether you keep your receipts secure, safe, and available if you need to make a warranty claim.

Restore Disks (Time to Complete: No more than 10 minutes)
Your new system most likely comes with Windows 10 preinstalled. That’s great – that saves some work! You need to realize though this likely means you do not have CD’s to reinstall Windows if the need arises. So, to be on the safe side, you will need to create restore disks. Use this Microsoft link and follow the directions.

Windows Live Account (Time to Complete: 2 – 3 minutes)
When you first start your computer, Windows will ask you to either sign on to your Windows Live email account or to create an account with Microsoft. This is not necessary but it does add some functions to using Windows across multiple units such as those between your desktop, laptop, tablet, or Windows phone. If you do not have any of these other items, ignore the offer to create an account. If you have logon credentials with MSN or Outlook.com then that login is your Windows account. For more information follow this Microsoft FAQ link.

Set the System Restore (Time to Complete: 2 – 3 minutes)
System Restore, by default, is not enabled. You need to set this up to keep the system as safe as possible. Information on how to enable the system restore can be found by following this Microsoft link.

Backup Admin Account (Time to Complete: 5 – 10 minutes)
Create a Backup Admin account. Many problems can arise should you have one admin account and it gets damaged. If you create a backup admin account you can simply work around the issue rather than working through hours of trying to undo whatever created the issue. Save yourself the time and unpleasantness by setting up a second one right away.

Note: The big time saver when doing something like this is reading through the instructions first – even if you feel they were written in a foreign language or in complete tech talk. It does help to have some idea of what commands are used. This should take 5 -10 minutes going at an easy pace.

You can use this helpful site with easy to use instructions.

Stage 2

Beware Freeware (Time to Complete: Up to 30 minutes)
Check the “All Programs” list in PC Clean Maestro. Open the program, click the Uninstaller tab and review the items in the list provided. Many new systems include a list of freeware and trialware programs.

If you have already purchased an antivirus program and are going to install it, do not leave a free antivirus on the system as you could experience interference and compatibility issues. Stay with the programs you know and save yourself the frustration of programs popping up on the screen.

Note: The time to complete will vary from retailer to retailer, but give yourself lots of time to do this as you do not want to rush. Give yourself 30 minutes to look through the list, research the programs and make a decision about if you really want the program or not.
If you are in need of an AV app… this would be a good opportunity to install and run CompuClever AntiVirus PLUS on your system. It’s designed to deliver the best performance for your PC and it’s built on the most advanced antivirus technology available today.

Remove Remnants (Time to Complete: Up to 3 minutes)
After installing your programs remember to clear up the install remnants so the drive is clear of unwanted files. Open PC Clean Maestro and from the “Clean” page, confirm that the items you want to scan and clean are checked. Next, click the Start button. The scan will be quick and you can easily review items before removing them. It will take more time to review the findings then to scan or clean them.

Registry Scan and Fix (Time to Complete: Up to 3 minutes)
Now that you have removed unnecessary and unwanted files, it’s time to clear the registry as there may be remnants that have not been removed. To scan and clean your registry open PC TuneUp Maestro and click the “Optimize PC” page in the left panel. Click the Registry Defrag option and perform the Express Scan.

Note: If you want to do a Deep Scan be prepared to have the scan take longer. Using a new PC with decent speed, we have experienced even the Deep scan to take less than a minute.
When the scan is complete, review the results and click the Defrag button.

HD Defrag (Time to Complete: Up to 30 minutes)
After removing items from your computer it’s time to address sorting – defragmenting – the hard drive for best performance.

Important: Before we begin, you need to make sure that your hard drive is NOT a Solid State Drive (SSD). You do not need to defrag a SSD due to the fact they use a different storage technology. Check your product information and if you PC is using a SSD, move on to the next task which can be found in Stage 3.

If your new PC uses the traditional spinning platter hard drive (HDD), we recommend using good PC habits right from the start and defragmenting it. Good practice is to defrag your HD when you remove items of significant size (applications, media files, etc.). To defrag your drive, Open PC TuneUp Maestro and click the “Optimize PC” page in the left panel. Click the Disk Defrag option at the top of the list and follow the instructions.

Stage 3

Power Bar (Time to Complete: Varies)
Is the light on the power bar flashing or flickering? If so… replace it. This is the least expensive insurance policy you can buy for your new computer. That flashing or flickering light means it needs to be replaced.

Note: The time to complete this depends greatly on when you can get to a store and purchase a new power bar.

Windows Updates (Time to Complete: 10 – 30 minutes)
Check for updates from Windows. Windows 10 supplies driver updates for all your devices (video cards, printers, etc.), so it is possible that when Windows was installed the devices were not connected. To be certain everything has the correct drivers you need to run an update: use this Microsoft site for details. Please note Windows 10 could start performing updates before you choose to do so. If it does let the process complete itself as trying to stop it could lead to Windows having problems before you get to use your computer.

Note: Time to complete depends on the amount of updates needed. This depends on how long ago the retailer created the image for installing Windows 10, the speed of your Internet connection, and the speed of your CPU.

Conclusions:

Now that you have completed the steps – there is no reason why your PC shouldn’t be performing at top speeds. You should notice fast startup times as well as exceptional file access and program startup performance. We hope this article has helped you to feel less intimidated with your new and somewhat unfamiliar PC acquisition. Taking the right steps right from the get go is critical and we think these tips will support you well in that regard.

Feel free to visit our Support Center at: https://www.compuclever.com/support/ If you have some ideas of topics you would like us to cover or have other feedback to offer, email us at: newsletter@compuclever.com


[1] www.consumerreports.org

Filed Under: Blog, computer fixes, Newsletter, PC Backup, PC Clean Maestro, PC hardware, PC security, PC TuneUp Maestro, Windows 10, Windows tips

Product Review: A 4-in-1 Leisure Outdoor Backpack for Your Laptop

January 21, 2016 by Andy Thompson

Welcome to our first installment of our all new “Gears & Gadgets” column! With these articles we set out to provide well-researched feedback and review of items that could in fact make your “PC and tech life” more enjoyable. As the editor-in-chief, I took the liberty of penning the introductory issue and picking the first product: a 4-in-1 multifunctional backpack.

– Andy Thompson, Editor-in-Chief

This past Christmas, my wife and I decided to escape the wet and chilly weather common to the Pacific Northwest to spend some holiday time in Long Beach, CA.  Two weeks before the trip, I realized that instead of bringing my laptop shoulder bag I actually needed a different bag other than my usual Samsonite carry-on suitcase.  This bag needs to be more than just multifunctional.

I actually sat back and wrote down my “wish-list” for such an item:

  • It must provide a secure compartment for my laptop because I will be working occasionally during the trip.
  • It must be a backpack because I will use it during my daily excursion trips to various tourist attractions in L.A.
  • It should provide good compartment space, but not too big to carry, and it must fit in the overhead bin because it will be part of my 2-piece carry-on.
  • It should be well-constructed with high quality material to suit my ongoing needs when I am back in the Pacific Northwest; like hiking and camping trips.

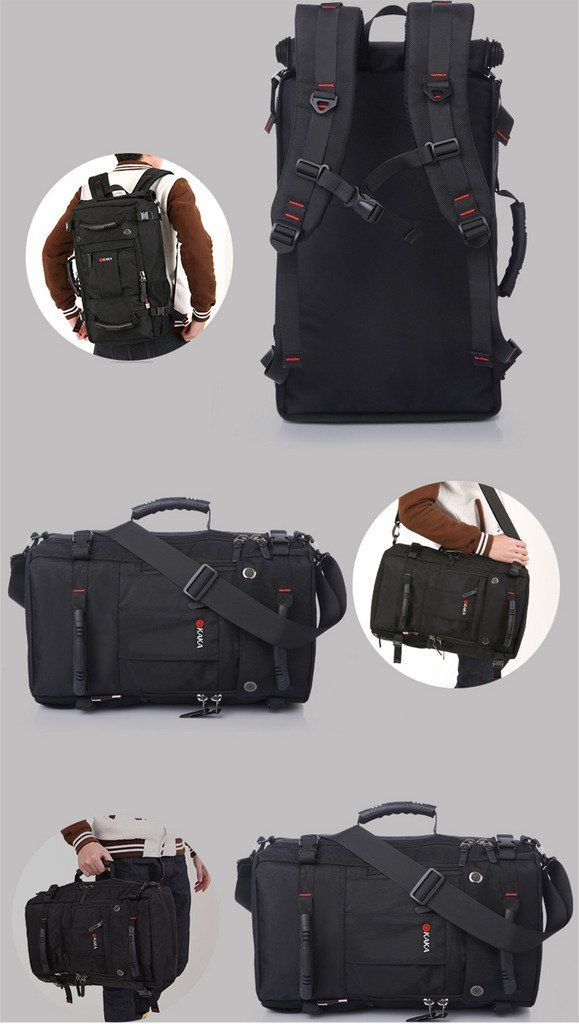
To be honest, this list is very demanding and I wasn’t even sure this type of luggage even existed.  I started my quest using Amazon.com by searching for certain keywords.  After spending some time filtering through hundreds of results, I took specific interest in a multifunctional backpack that not only satisfied my list but also provided many more other options.  According to the product images and description, this is a 4-in-1 multifunctional bag that serves as: a backpack, a travel duffle bag, a messenger bag, or a carry bag.  I was quiet amazed and thrilled.

As an avid reader and technical writer, I have been a long-time Amazon member for over a decade.  My purchases have only been for books, including both paperbacks and lately Kindle versions.  But I had never purchased any physical goods from Amazon.  So I emailed the vender with a few questions, verifying that the bag can fit my 15” laptop.  I placed the order and the bag arrived the day before my trip so I had an opportunity to test the bag. The result?  It exceeded my expectation!  Here is what I like about this bag:

4-in-1 multifunctional

This bag can indeed be converted to one of the following types:

  • A backpack for daily usage or outdoor purpose.
  • A travel duffel bag that can be stuffed and tossed in your trunk.
  • A messenger bag that one can carry over one shoulder.
  • A handbag to carry with a single hand.

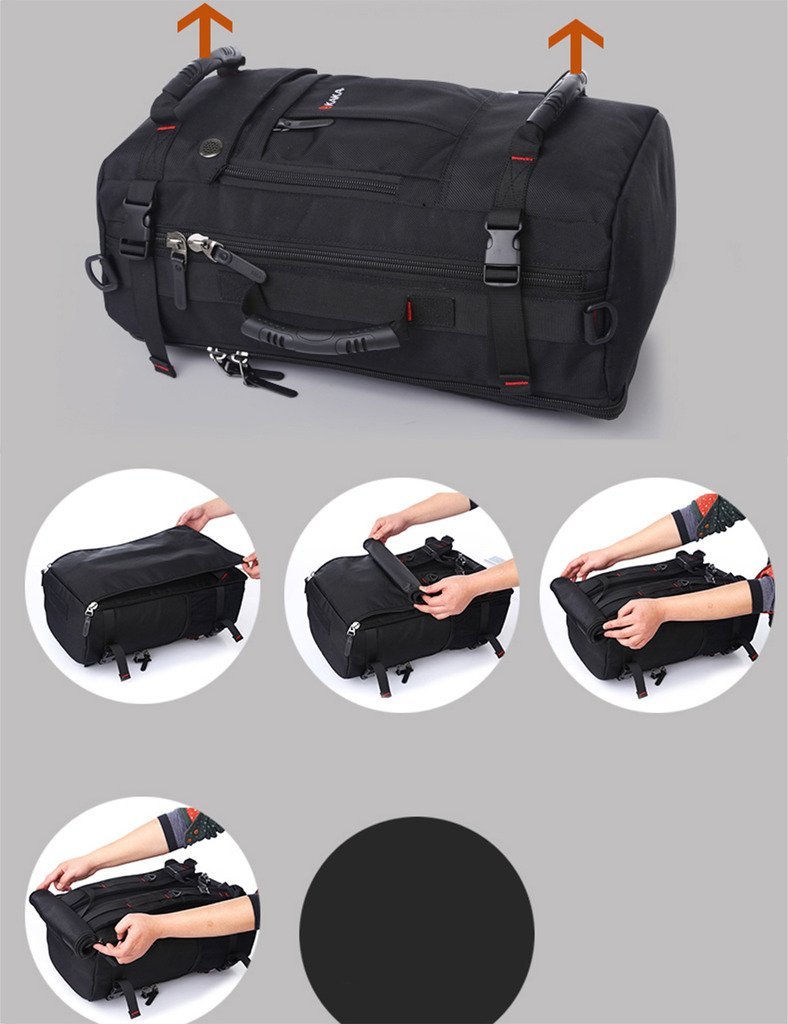
The design of conversion was well thought of because converting from one type to another takes less than 10 seconds, whether it involves removing / attaching shoulder straps or revealing / hiding the backpack shoulder straps.

A secure laptop storage

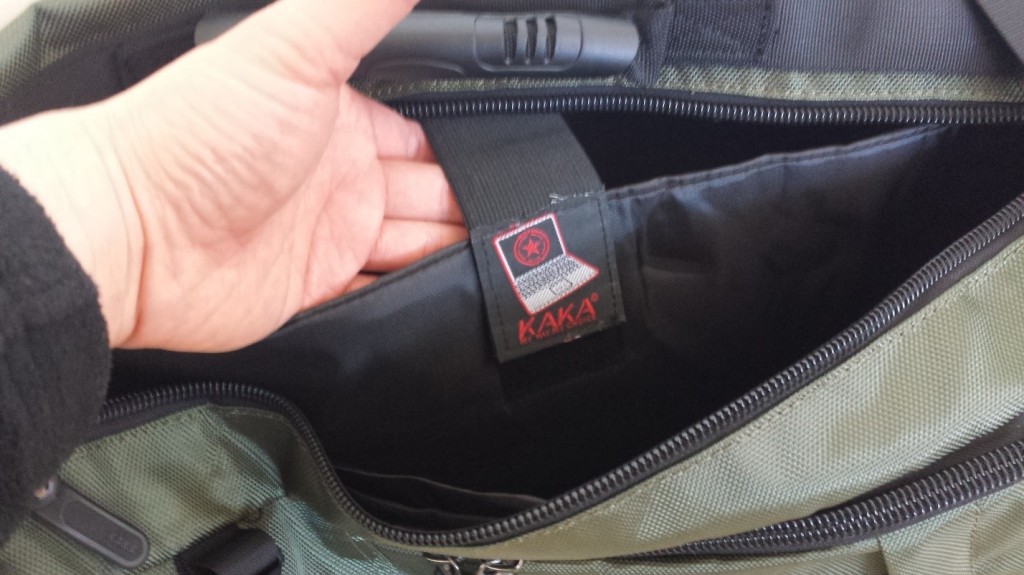
This bag can not only fit in my 15” laptop but also features a purposefully designed laptop storage compartment with secure strips.  The back of the backpack is also designed to provide enough cushioning for shock absorption as well as provide ventilation for extended comfort.

Roomy but not bulky

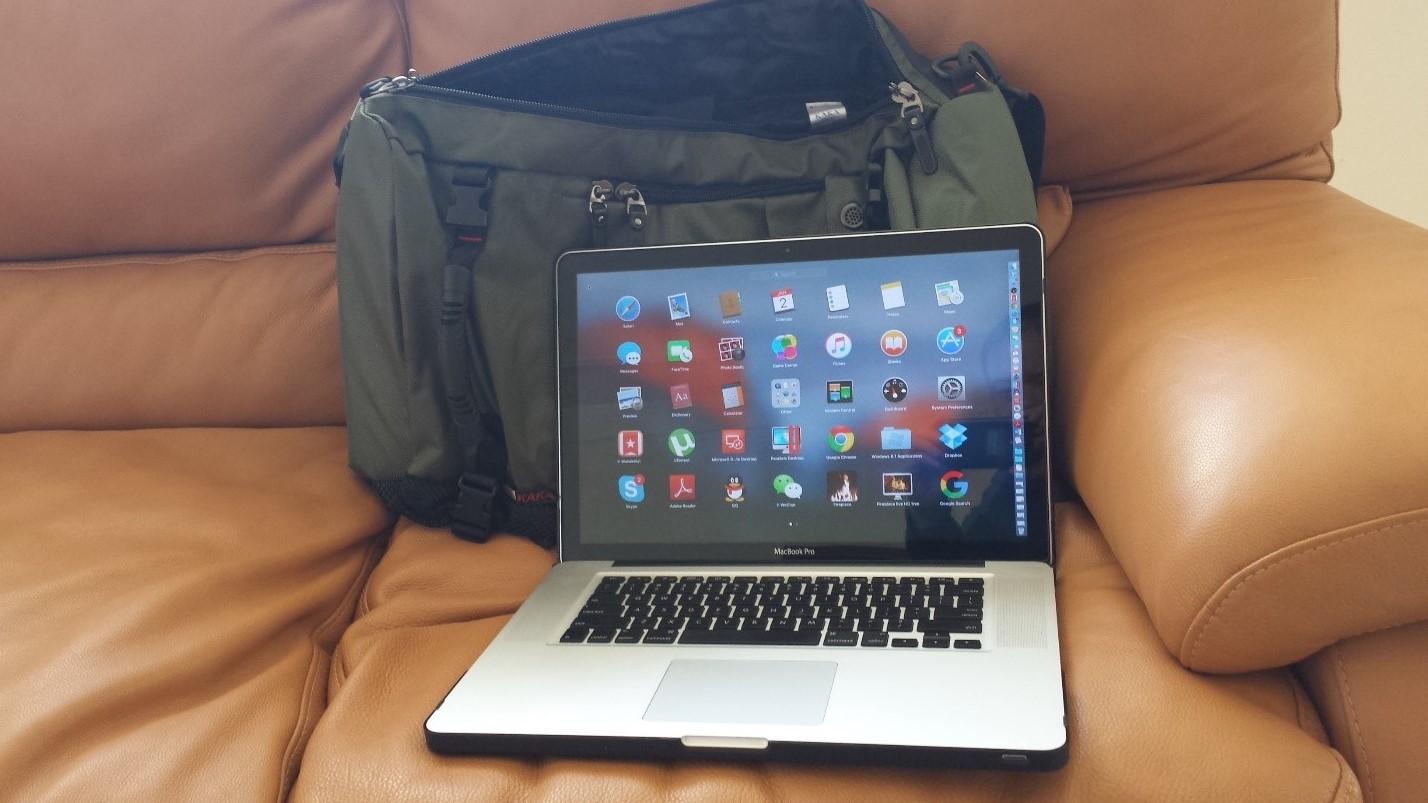
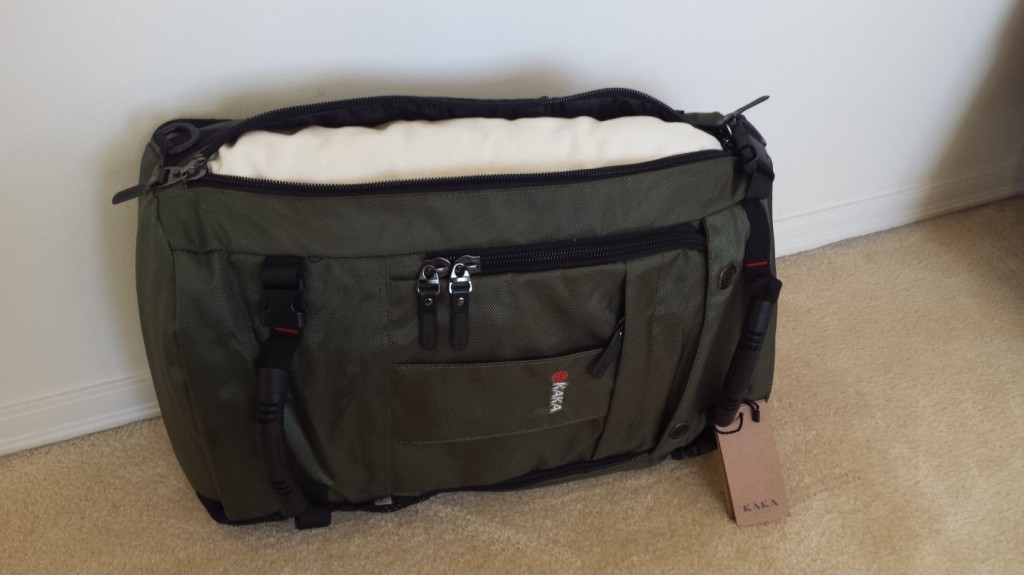
The capacity is amazing; although I only chose the medium size bag, it can host quite a bit of stuff.  I managed to stuff an entire IKEA sofa cushion (see image below) while my laptop snuggly tucked away in its own compartment.

Nevertheless, you can still stay stylish, in the event you decide to dress in business-casual and use it as a messenger bag or hand bag. It is because the bag doesn’t look bloated when not stuffed to its full extent.

Good design and quality

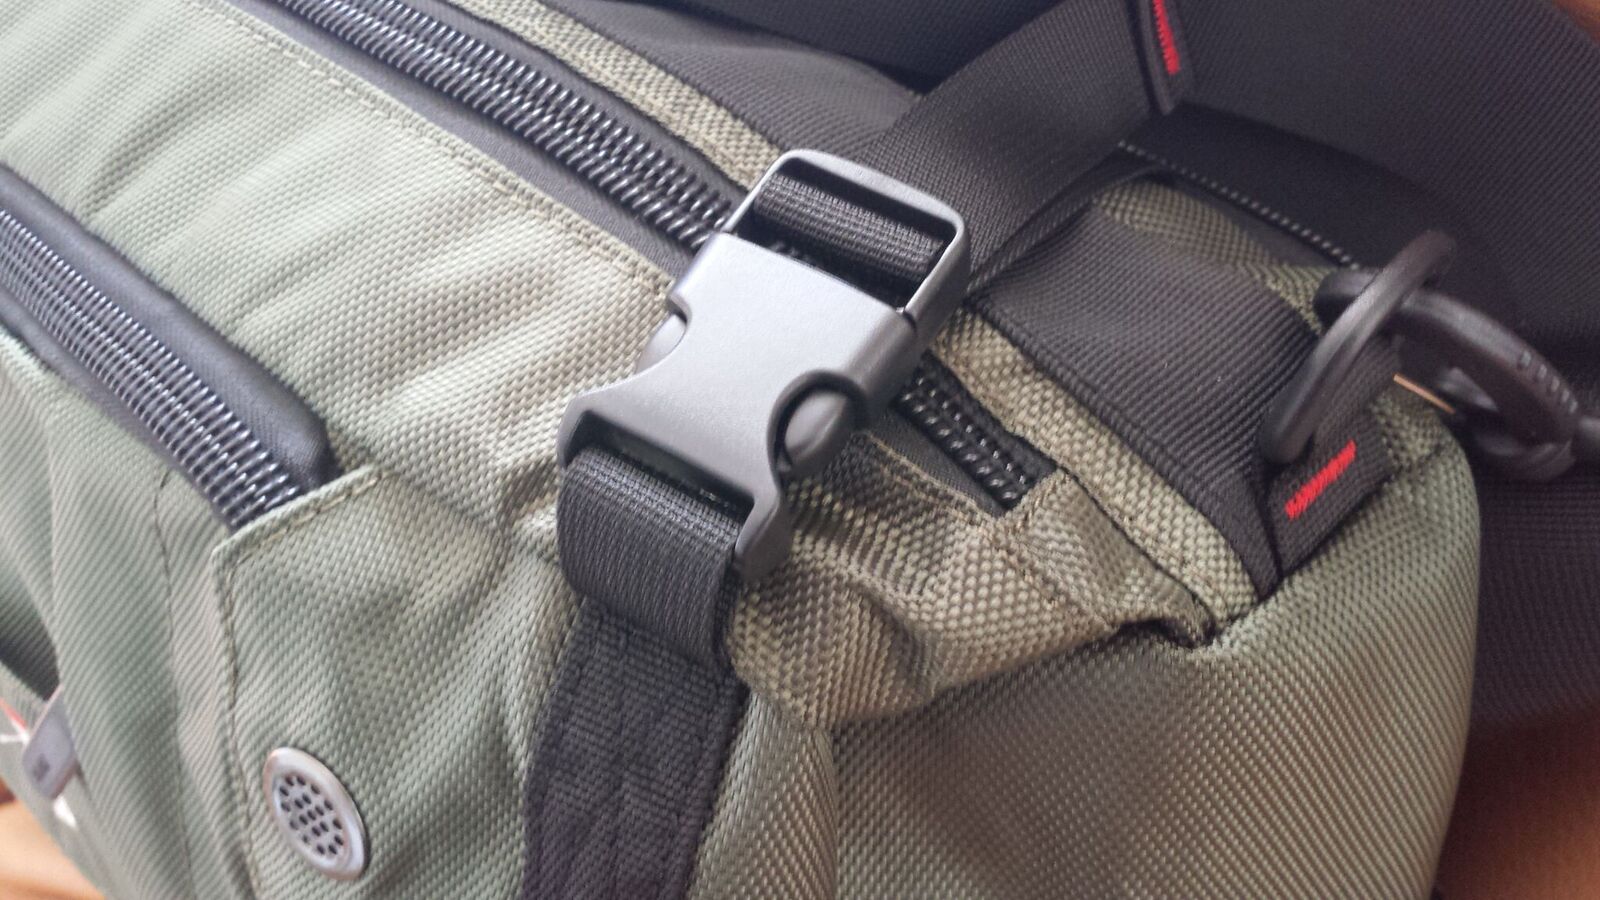
The material and construction of the bag is high quality, featuring waterproofing, terylene oxford nylon fabric and heavy duty durable luggage parts (I refer here to the buckles, the straps, the zips, etc.).


After returning from the holiday trip, I lost the bag to my 13-year old son who convinced me that he could make much better use of it as a school bag because he has way more “important stuff” to carry on a daily basis.  Well, I just ordered another one because I am more than convinced that this bag really fits my ongoing needs as well, whether for mountaineering, hiking, camping, backpacking, business travel, or personal vacation.

Recommendation and Offer

As is fairly obvious – I recommend this item highly.  So much so, that during the course of writing this column, I managed to get a few of my CompuClever colleagues convinced that this is a worthwhile purchase so I actually reached out to the vendor and managed to get some fairly awesome discounts.

Furthermore, I was also authorized to pass these discounts to our readers and subscribers for a limited period of time.  If you are interested in this multifunctional bag and want to purchase one for yourself, you can use the following coupons to get some considerable discounts.

  • Visit our very own online store at CompuCleverGear.com for an amazing deal of this versatile backpack.

That said, I have to provide a disclaimer: neither CompuClever nor myself will financially benefit from any purchase that may result from this article, which serves as a purely independent review.

I hope you enjoyed our very first volume of the newly minted “Gears and Gadgets” column.  We will bring more creative and smart high-tech products to you on a regular base.  If you have any specific interest that you would like us to cover, simply send us an email to: newsletter@compuclever.com

Filed Under: backpack, bags, Blog, Gears and Gadgets, Outdoor, suitcases

  • « Previous Page
  • 1
  • …
  • 6
  • 7
  • 8
  • 9
  • 10
  • …
  • 30
  • Next Page »

Don't miss out

Get a copy of "5 Tips for a Fast PC" when you sign up for our free "PC Tips" newsletter.

Subscribe Now
Archive Newsletter

Recent Posts

  • Ultra File Opener 5.7 Release Note

    Ultra File Opener 5.7 Release Note

    July 24, 2018
  • How Blue Light Affects Your Health and What to Do About It

    How Blue Light Affects Your Health and What to Do About It

    May 11, 2018
  • How to Protect Your Privacy & Identity on Facebook – Part 2

    How to Protect Your Privacy & Identity on Facebook – Part 2

    April 18, 2018
  • Facing the Truth – Facebook & Privacy

    Facing the Truth – Facebook & Privacy

    April 7, 2018
  • Spectre and Meltdown:  Massive Security Holes Impacting All Mac and PC devices

    Spectre and Meltdown: Massive Security Holes Impacting All Mac and PC devices

    January 12, 2018
  • How to Fix Computer Sound Problems

    How to Fix Computer Sound Problems

    December 19, 2017
  • Correct Ergonomics Sitting at a Computer Desk

    Correct Ergonomics Sitting at a Computer Desk

    November 17, 2017
  • Five Useful Tips and Tricks for Windows 10

    Five Useful Tips and Tricks for Windows 10

    August 27, 2017
  • Going Incognito – Browse Web in Privacy Mode

    Going Incognito – Browse Web in Privacy Mode

    August 4, 2017
  • Don’t be Held at Ransomeware

    Don’t be Held at Ransomeware

    July 14, 2017
Contact Us | Privacy Statement | Terms of Use | EULA | Partner With Us | Uninstall | Blog
CompuClever© Systems Inc. 2023 All rights reserved.
Microsoft is a trademark of the Microsoft group of companies. All other trademarks are the property of their respective owners.